No products in the cart.
20
Apr
Apr
LIVE - Rebellion Reads Posts
Birth Of REBEL Cartridges | Tattoo Equipment Evolution Pt. 9
From Underground to Precision: The Birth of REBEL Tattoo Cartridges
Where My Journey Began
My name is Caesar The Hun. The Birth of REBEL Tattoo Cartridges is rooted in my story as a tattoo artist. I’ve been tattooing for more than 25 years, starting in the early ’90s in Hungary, when tattooing was still underground and heavily restricted. During those years and later through my studio Caesar Tattoo, I worked with clients around the world. At that time, traveling to the West required government approval, and professional tattoo equipment was almost impossible to get. Even getting customs papers for my tattoo machines was a project.
In those days, premade needles didn’t exist—not even in the U.S. I bought loose needles in boxes of 1,000 or 5,000, matched them to different jigs, and soldered them together by hand. Mondays were always split between consultations with new clients and hours of soldering new sets of needles, unsoldering dull ones, and discarding what couldn’t be saved. Burned fingers came with the job—the soldering iron had to get hot enough to liquify the rosin-core flux.
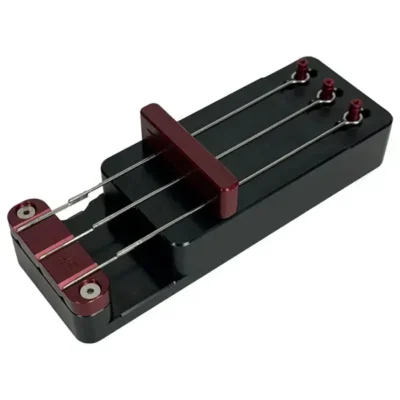
Early Tattoo Equipment Before the Birth of REBEL Tattoo Cartridges
We worked with steel tubes and needle bars—nothing disposable. To stay safe, I sterilized them in an autoclave, logged every cycle for the health department, and submitted proof each month. That process, by the way, followed strict health standards I still apply in REBEL today. After five or six uses, the needles dulled. I either unsoldered them to reuse the bars or tossed the entire bar into the biohazard container. I kept around a hundred steel tubes in rotation, scrubbing and sterilizing them after every use. Altogether, they weighed about 15 pounds.
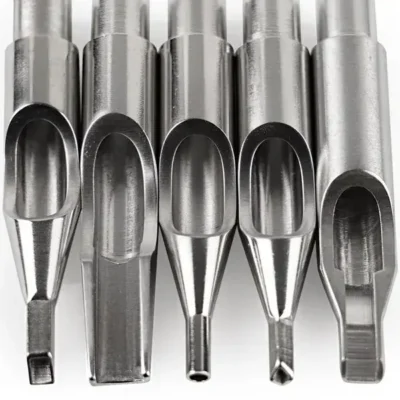
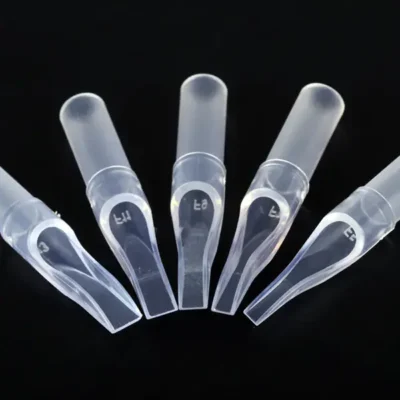
These were mostly three-piece parts held together with two screws: a steel tube, a steel grip, and a steel tip. One needle configuration required its own corresponding steel tip, paired with an endless range of grips in different shapes and sizes. It was a system with endless variations—and a serious investment. Today, we’d call this a “vintage” setup.
Tattoo Equipment Challenges in the Early 2000s
Traveling with all that gear wasn’t ideal, I felt like I need a 18-wheeler to carry my gear. 🙂 Flying was nearly impossible—one-third of my luggage allowance was just tubes, and I still had to pack the rest of my setup. When I landed in New York in 2002, I could only bring my tattoo machines. The rest I had to replace.
Those were the “good old days,” if you want to call them that.
New to REBEL?
Use code FIRST20 at checkout and get 20% off your first order.
Premade Tattoo Needles Before The Birth Of REBEL Tattoo Cartridges
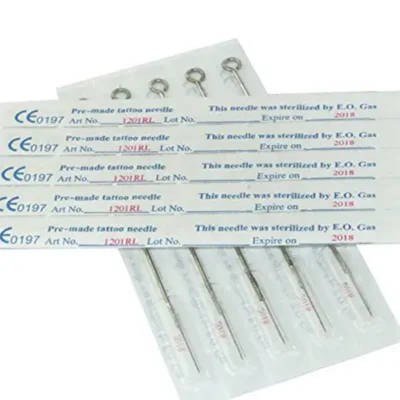
By the mid ’90s, premade needles began appearing. Suddenly, that change felt like a huge relief. I no longer had to spend hours soldering, although I still had to keep up with sterilizing tubes every week. Pre-made and pre-sterilized needles price quickly started dropping as they earned popularity and thus the cost of each tattoo setup.
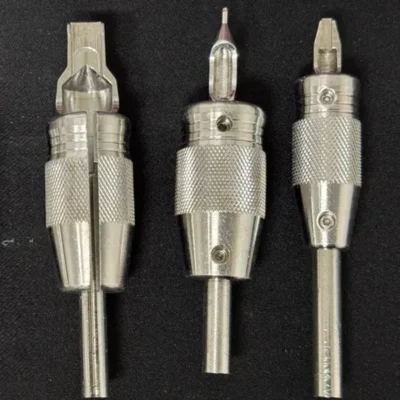
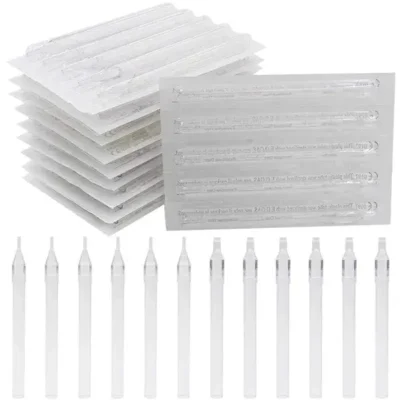
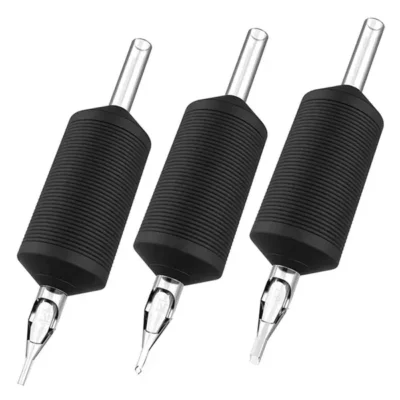
Not long after, disposable tips and tubes showed up in all sort of transitional combination from all steel. I had the option to keep my steel tubes and only buy disposable plastic tip or go with the entire plastic tube variation. Option three was selling my steel tubes and completely convert for disposable one piece tube and grip.
Finally, no more scrubbing, no more sterilizing, and no more autoclave hassle. That innovation felt like a revolution.
The Birth of the Tattoo Cartridge Era
In 2007, Cheyenne, a German company, launched something completely new: a strange-looking rotary machine they called the Hawk. It had nothing to do with a bird at first sight… or even at second. 🙂 This machine ran on small 2.5-inch modules they named tattoo cartridges. Everything about it felt weird, and to make things harder, the sales guy’s accent was even heavier than mine. Communication was a challenge. He had nothing to do with tattooing—he came from the music sales business on a trial run. No professional knowledge, but what he did have was honesty. His name was Konrad. We became friends (rest in peace). And despite the quirks, the setup caught my attention right away.
It had already taken me years just to learn how to run a coil machine well enough to pull a decent one-inch line. Before I could call myself a tattooer, I had to be a tattoo machine operator. Why? Because with a coil machine there are about ten different variables that can go wrong—and when they did, the result wasn’t pretty.
VS
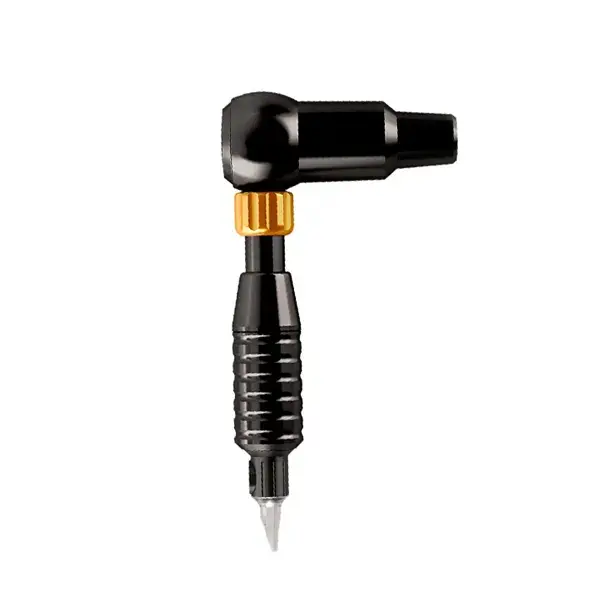
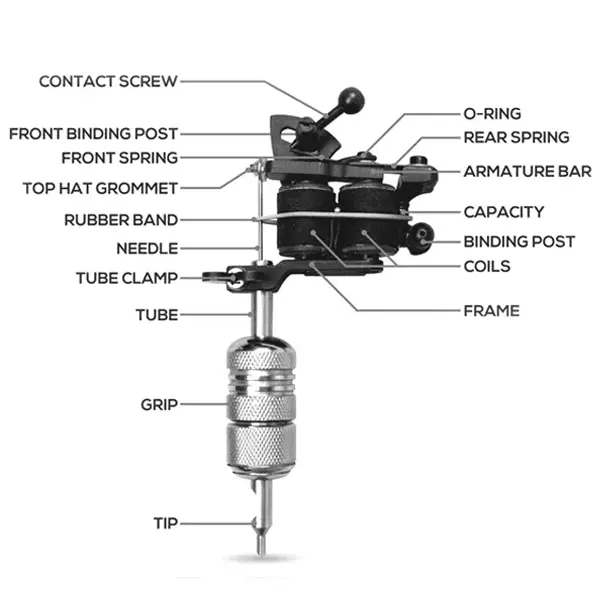
Coil Tattoo Machine vs Rotary Tattoo Machine Operation
As you can see, the traditional coil setup is full of screws, adjustments, and headaches. I wasn’t the only one—many respected artists admitted they spent more time tweaking their coils than tattooing, but we didn’t knew any smarter way. Were were sharing and teaching each other. The technology wasn’t there. The new German “weirdo,” on the other hand, had only two variables: stroke and speed. And the stroke was built right into the grip like a ratchet. The whole machine was just two pieces—the grip and the motor. That was it. Game over. No screws. Suddenly, I realized how screwed my existing system was, and how genius this new one could be.
The Physics Behind Rotary Tattoo Machines
The Cheyenne Hawk’s core operation theory wasn’t far from Samuel O’Reilly’s 1891 patent. A coil machine’s armature bar only moves vertically—up and down, what we call stroke in tattooing—keeping the needle tip aligned with the tight-tolerance steel tip for precise lines. But with a motor, the situation was different. A motor axle spins. Rotation doesn’t create vertical stroke by itself. So how do you turn spin into clean up-and-down motion? Physics. 🙂
Converting Rotary Motion Into Tattoo Stroke
The simple solution was to fasten a disc to the axle with a pin, then hook the needle loop onto it. This way, the needle bar traveled in a circle, creating the up-and-down stroke (12 and 6 o’clock). But there was a catch—it also moved side to side (3 and 9 o’clock). The distance between to top and bottom position of the pin determines the stroke length.
Problem solved, right? Not quite. That sideways play meant the needle never stayed in one pinpoint spot. Instead, it traced a lazy zig-zag, making it impossible to pull a sharp, clean line. This is where engineering meets tattooing — you either understand both, or you miss the whole point.
This was the birth of stroke control — and the moment tattooing quietly became a field of precision mechanics.

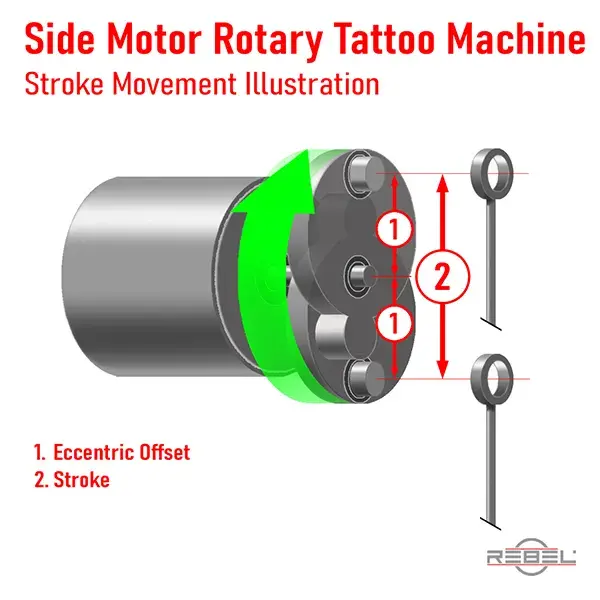
Rotary tattoo machine anatomy simplified — proof that physics isn’t just for classrooms. This little disc-and-rod trick is what turned spinning motion into tattoo stroke.
How the Cheyenne System Perfected Vertical Needle Motion
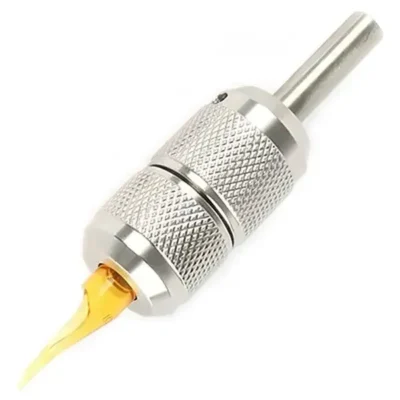
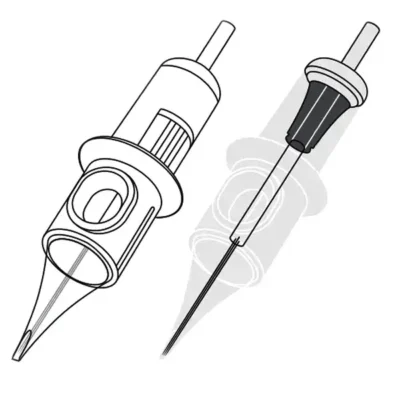
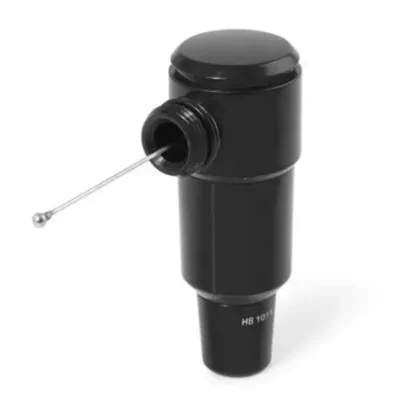
The workaround was simple in theory but complex in execution: separate the needle from the bar so the rotation converted into clean vertical motion. That’s what Cheyenne developed. A rod extended from the drive mechanism of the tattoo machine, hidden inside the attached tube, topped with a small ball. This ball maintained contact with the plunger of the cartridge needle. As the rod carried side play from the motor, the ball corrected it during plunger contact, turning it into a straight vertical movement.
Here’s where the membrane’s quality became critical. The rod pushed the needle downward, but since the push rod wasn’t attached to the plunger, it was the silicone membrane’s job to retract it smoothly. And let’s not underestimate the stress involved: at 50Hz, the tattoo needle penetrated the skin 50 times per second. Crank it up for faster work, and it could reach 150Hz. The motor had to be strong enough to drive this force, and the retraction system couldn’t fatigue or fail—otherwise, the cartridge would break.
Sounds simple, huh? In reality, it required a completely new system, massive investment in R&D and production, and then the uphill battle of convincing stubborn tattoo artists that this pricier, exclusive system was worth it. 🙂 Against the odds, Cheyenne pulled it off—and their risk paid back over the long term. That’s why I respected Cheyenne’s gamble — they thought like engineers, not just suppliers. Years later, I would face similar challenges bringing REBEL to life.
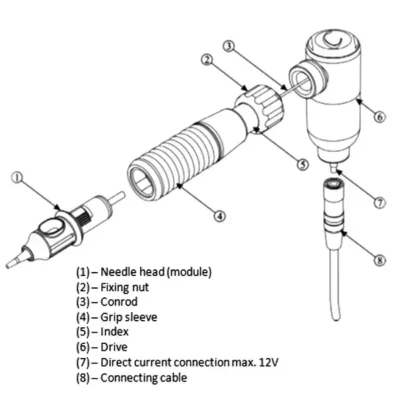
Quick translation from Cheyenne’s official part list from German-English to Tattoo-English :-):
- Tattoo Cartridge
- Nut
- Push Rod
- Grip (yep, just a grip)
- ? (seriously, I have no idea what INDEX supposed to be)
- Motor
- Jack Plug
- Power Cable
Cheyenne’s Hawk and the First Tattoo Cartridges
For the first five years or so, cartridges and the Hawk machine were only available through Cheyenne. Cartridges were expensive ($1.50–$2.00 compared to a few cents for a bar needle) and supply was extremely limited. Cheyenne already had a reputation in cosmetic tattooing in Europe, but here in the U.S. we had no clue. This was their first real step into professional tattooing.
Regardless of the cost, I liked the idea and gave it a shot. My first Cheyenne machine carried serial number 133—that means I was there at the very beginning. Once I tried cartridges, I never went back to coil machines. This was around 2008–2009, if memory serves.
Why I Fell In Love With The Cartridge System
- Rotary machines ran quietly compared to coils, so I could joke with my clients—break their balls—without shouting over the buzz.
- The system eliminated soldering, unsoldering, cleaning, and sterilizing. No more burned fingers.
- My setup time dropped drastically.
- The workflow felt more sanitary.
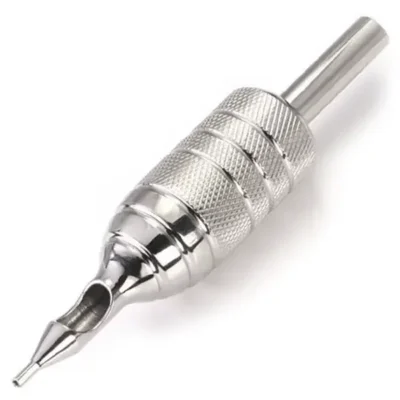
- The two-piece housing let me access needles easily and clear away paper clogs.
And the cost? Worth every penny for the convenience.
Searching for Better Tattoo Cartridges
For years I stayed loyal to the brand. But eventually, sourcing cartridges became harder. Manufacturing issues caused delays, they were often out of stock in the U.S., and prices never came down—even when cheaper competitors flooded the market around 2015.
T-Tech from China, for example, offered double the cartridges for half the price. That made me ask: why keep struggling with loyalty when the brand clearly didn’t care about me? At that point, sticking with Cheyenne wasn’t loyalty anymore—it was self-sabotage. I felt it directly in my business, and even on my own skin. The frustration burned just like the old soldering iron on my fingers back in the needle-making days. No good. 🙂
Testing Alternative Tattoo Cartridges
I wanted to keep my beloved cartridge-operated machine, so I started testing alternatives. Some I bought, some landed in my lap for free. Most looked ugly, felt clunky, or just plain failed the job. At the time, I had no clue which technical details separated a good cartridge from a bad one—I only had my experience and my instinct to judge. I called fellow artists, asked what they trusted, and compared notes. But trying to memorize every brand, wasting money on boxes I didn’t even like, and still not finding consistency? Exhausting.
And that’s when it hit me: even the so-called “name-brand” suppliers were unreliable, hit or miss at best. By then, I wasn’t just an artist buying tools anymore—I was the guy who could spot exactly why they failed. Every flaw stood out to me like a bad line on skin. Creating a cartridge to my own specifications wasn’t just an idea anymore—it felt inevitable.
Why I Decided on the Birth of REBEL Tattoo Cartridges
At the end of the day, as I said in the previous post on Tattoo Needle Manufacturing, the heart is the needle. Quality and craftsmanship matter far more than any fancy plastic housing.
That’s when the thought hit me: instead of chasing other brands, why not create my own?
Why Cartridges Beat Traditional Tattoo Needles on Bars
The answer was obvious. Cartridges represented the future. They were smarter, smaller, safer, and customizable in ways traditional bars could never match.
My checklist was simple but demanding:
- Consistent high needle quality
- Affordable pricing
- Options for customization
- A clean, classic two-piece housing
- Branded packaging
- Responsive turnaround on orders
First Samples That Shaped REBEL Precision Cartridges
After a long search, a manufacturer finally sent me a package. Inside were ugly green one-piece housings and even uglier blue two-piece housings. I didn’t care about the looks—I cared about performance. I took them apart, looped the needles, and put them to the test.
And to my surprise, they held up. The cartridges survived five-hour sessions, the silicone membrane stayed strong, and the needles delivered crisp lines and solid fills. Over months of testing and constant back-and-forth with the manufacturer, something new began to take shape.
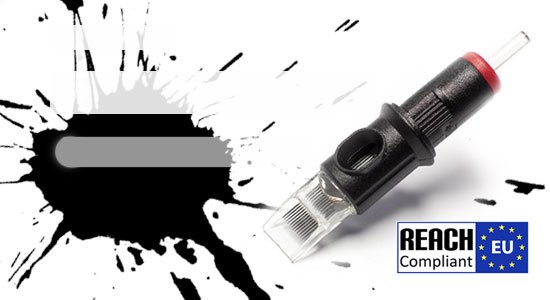
The Official Birth of REBEL Tattoo Cartridges
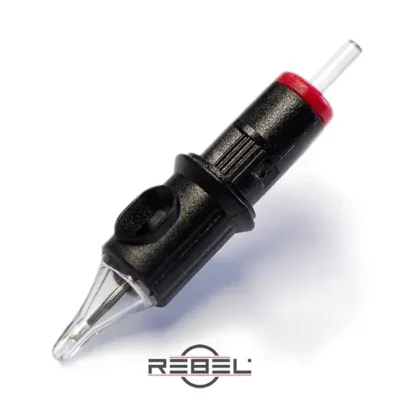
That “something” became REBEL Precision Cartridges. This moment marked the official birth of REBEL Tattoo Cartridges—born from frustration, forged through years of trial and error, and built for reliability.
They were built for artists like me who needed consistency, safety, and performance without compromise. And this was only the beginning.
Building the REBEL Brand and the Birth of REBEL Tattoo Cartridges
I established REBEL Tattoo Machine LLC in 2018 with the goal of developing my own tattoo machine. While working on that project, creating REBEL Cartridges gave me the final push to launch rebeltattoomachine.com and share the newborn Precision Cartridges with the world.
I launched the website in February 2020—right as COVID arrived and shut everything down. My first thought was: what the hell is going on? 🙂
What’s Next After the Birth of REBEL Tattoo Cartridges
How was my promising REBEL venture supposed to take off when the entire world—including the tattoo industry—was shut down? COVID forced me to slow down. However, it also gave me time to refine the website, sharpen my marketing, and plan the business for what came after.
The Birth of REBEL Tattoo Cartridges as My Legacy
The Birth of REBEL Tattoo Cartridges is more than a brand milestone—it’s the result of my lifetime as a tattoo artist. My name is Caesar The Hun, and decades of tattooing across the world have shaped the way I design and demand precision from every tool. REBEL Precision Cartridges were built for artists like me who refuse to compromise on safety, performance, or reliability. That’s why the Birth of REBEL Tattoo Cartridges isn’t just another product launch—it’s my legacy. Forged from decades in the chair, it’s built for the next generation of artists carrying the craft forward.
In the next chapter, I’ll show you how tattoo cartridges are manufactured and then dive deeper into the REBEL brand—the knowledge behind it and the experience that shapes it.
Careful engineering and strict quality control guarantee both performance and safety—the same standards that define every REBEL Precision Cartridge.
Frequently Asked Questions
What Inspired The Birth Of REBEL Tattoo Cartridges?
Caesar The Hun engineered REBEL Precision Cartridges after 25+ years of tattooing — from hand-soldering needles in Hungary to testing every cartridge brand on the market. When no supplier could deliver consistent quality at a fair price, building his own became inevitable.
Why Are Tattoo Cartridges Better Than Traditional Needle Bars?
Cartridges eliminate hand-soldering, sterilization cycles, and loose needle bar setup. A sealed housing, precision membrane, and consistent needle geometry replace a three-piece steel system that required 15 pounds of rotating equipment and hours of weekly maintenance.
Where Can I Buy REBEL Precision Cartridges?
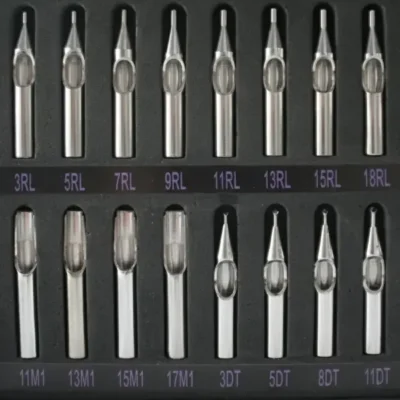
REBEL Precision Cartridges are available at rebeltattoomachine.com in 50+ needle configurations — built for professional tattoo artists who demand consistency, safety, and performance in every session. Use code FIRST20 for 20% off your first order.
Conclusion
Why REBEL Precision Cartridges Define The Standard
Twenty-five years of burned fingers, 15 pounds of steel tubes, and a German salesman named Konrad — that’s what it took to get here. Every flaw I encountered in every cartridge I ever tested is engineered out of every REBEL. Not by a supplier. By the tattooer who lived through all of it.
REBEL Precision Cartridges exist because the craft deserved better tools — and building them was the only honest answer I had.
Explore
For artists ready to elevate their work, browse the full range of REBEL Precision Cartridges — manufactured as value-driven tool, engineered for safety, consistency, and efficiency.
Read On
From here, continue with Cartridge Manufacturing – Part 10 of the Tattoo Equipment Evolution Series. You can read back on Part 8 – Tattoo Cartridge or browse all posts in Rebellion Reads.
Spread The Knowledge
If this article helped you, share it with fellow tattoo artists and let’s keep elevating the industry together.
Make Your Voice Heard By Leaving A Comment
Got questions or insights about today’s topic? Drop them in the comments — your voice helps push the craft forward.
“Frustration built REBEL. Value-driven precision keeps it alive.”
